 ช้างเผือก
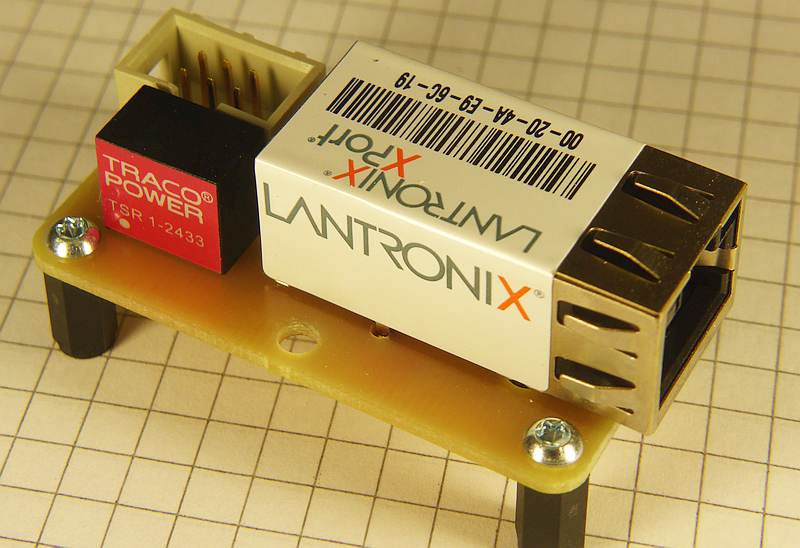
Categories
Statistics
Since 08.08.2014
Counts only, if "DNT = disabled".
Your IP is 18.221.174.248
ec2-18-221-174-248.us-east-2
Counts only, if "DNT = disabled".
Your IP is 18.221.174.248
ec2-18-221-174-248.us-east-2
Info

เราจะทำแบบวิศวกรผู้ยิ่งใหญ่
27. April 2024
Your valuable opinion :
UART-XPORT-Adapter.php 9061 Bytes 12-02-2018 11:23:29
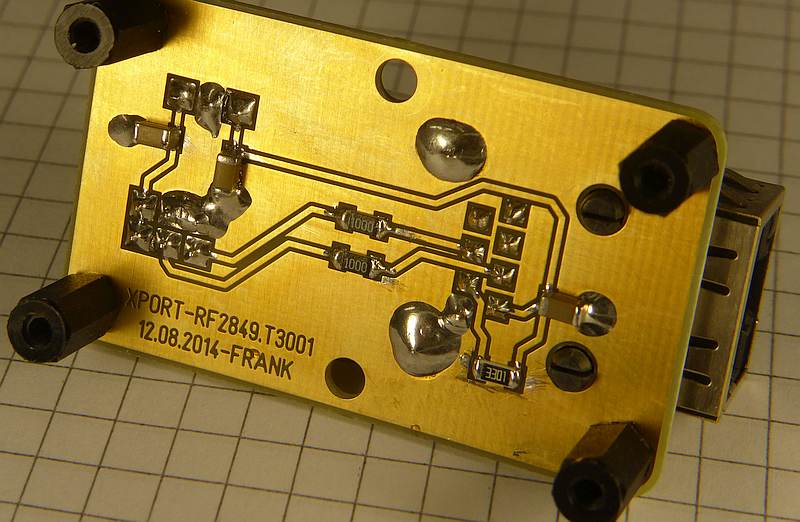
Micro-Projects • Tools : UART - XPORT Adapter
The XPORT is a versatile ETHernet shield which allows an easy way of connecting almost any microprocessor (UART) to the internet.
As memory or clock stability is nowadays a self-evidence, we dropped that handshaking stuff. Only RX and TX are used. And they are used therefore,
as the microprocessor would call them. The used 6-pin header has always the same pin assignment, so they (RS232,USB,XPORT,...) are all interchangeable.
The DC/DC converter (TSR1-2433) has proven to be the better choice, as linear regulators (may) cause huge current spikes, interferring with other
devices in your system.
Configuration • Setup
This device needs some setup, which can be easily done with the xport device installer.
Backup is here. Dont forget to click the 'OK' button each time.
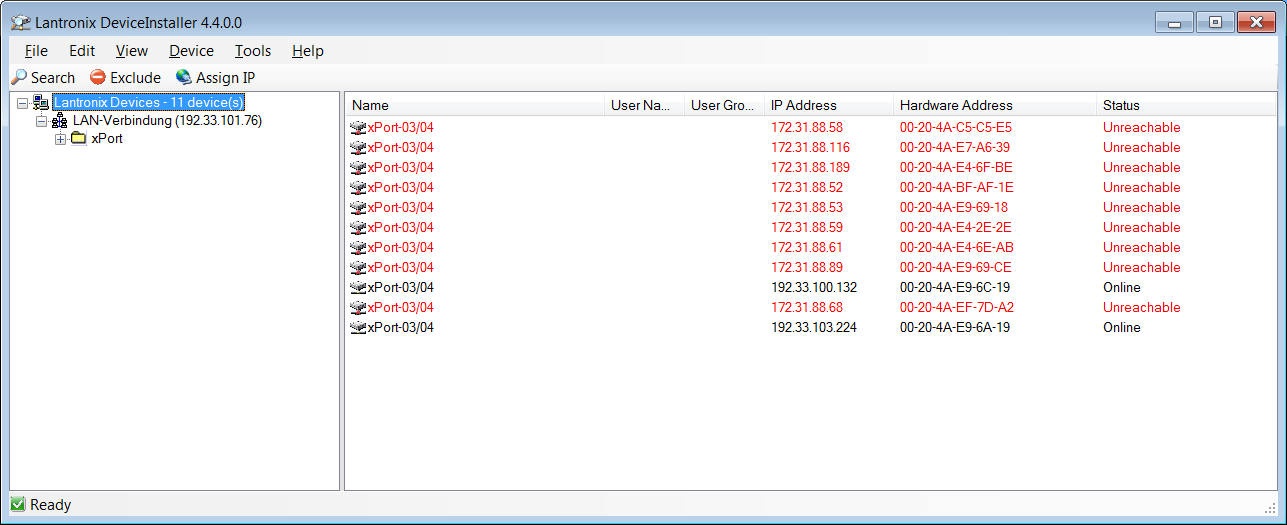
Step 1 : Find your device with the MAC-address
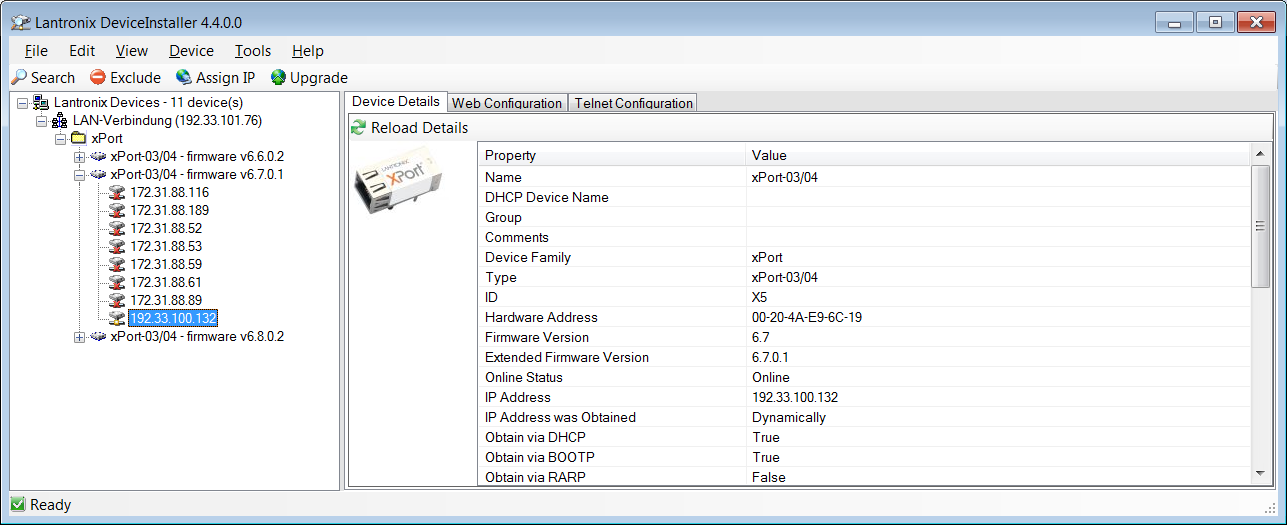
Step 2 : Click on the corresponding IP to see the details
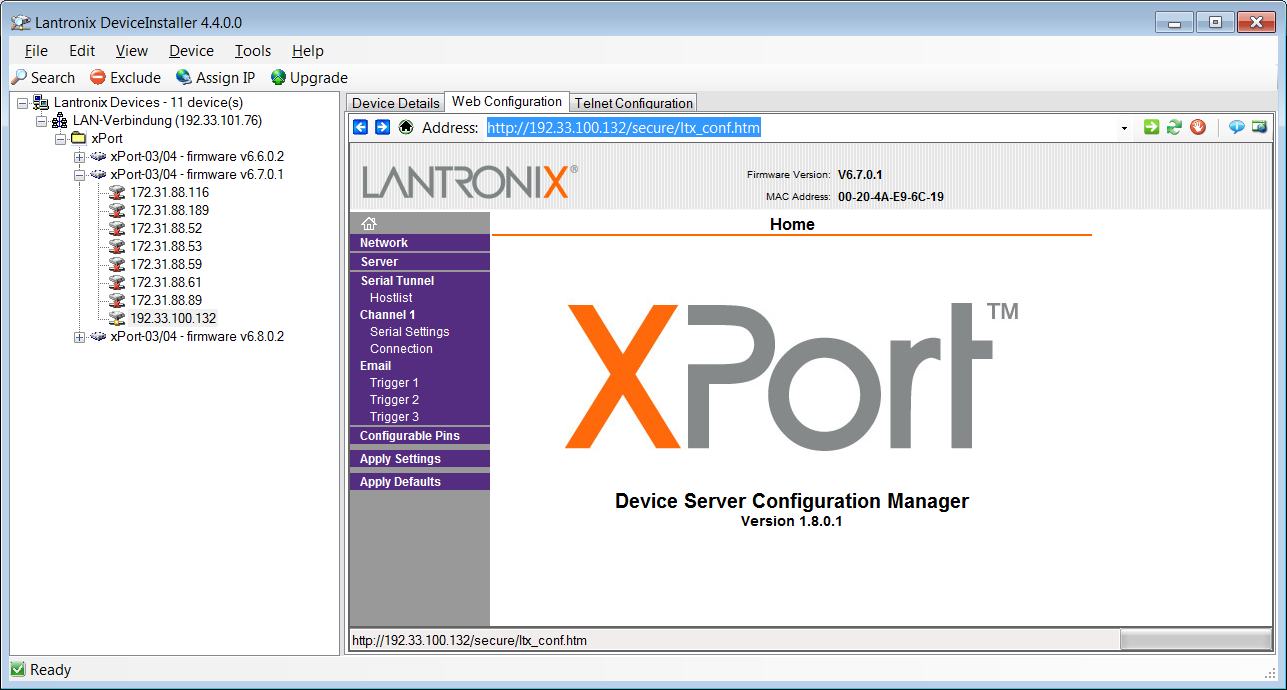
Step 3 : Proceed to 'Web Configuration'

Step 4 : Network Settings
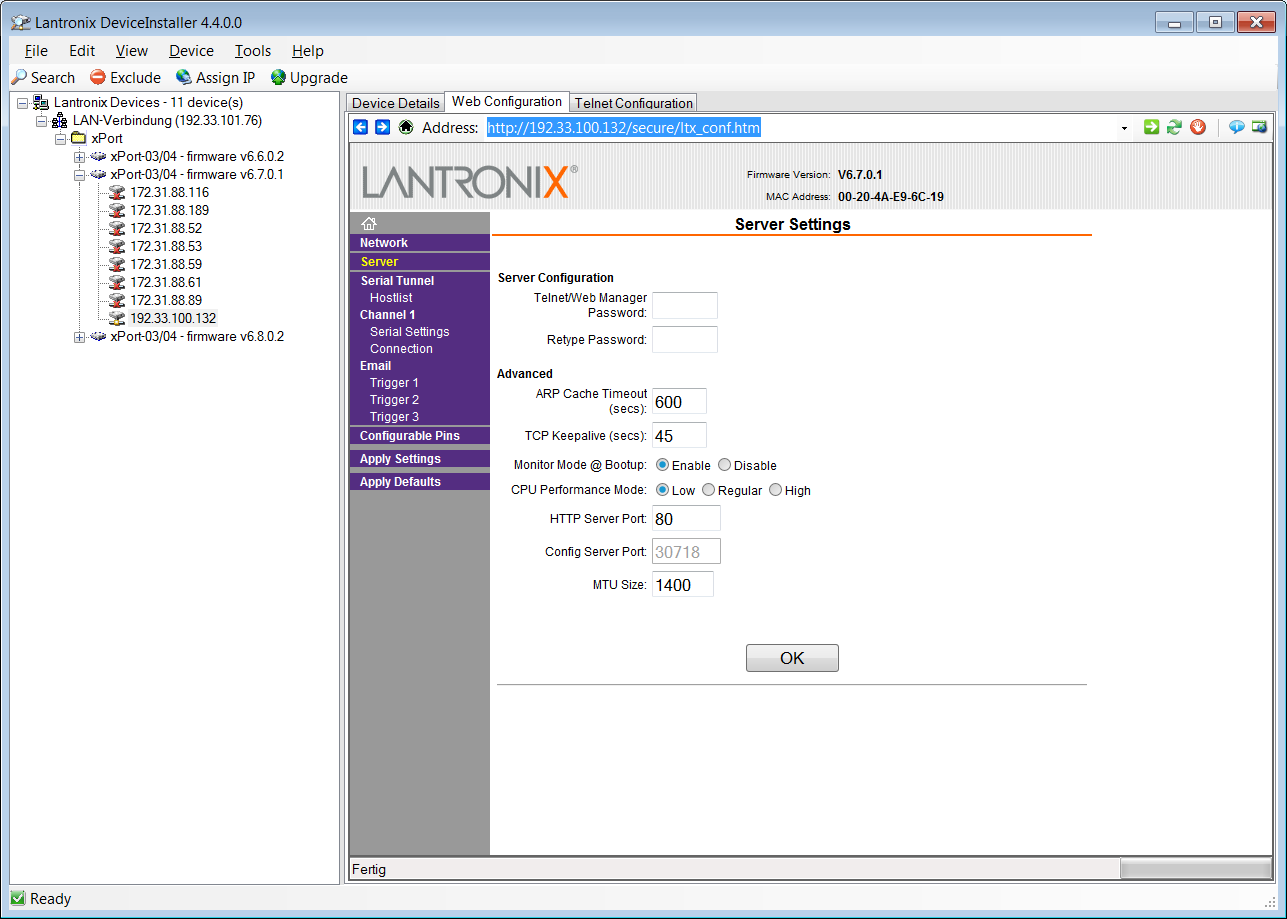
Step 5 : Server Settings
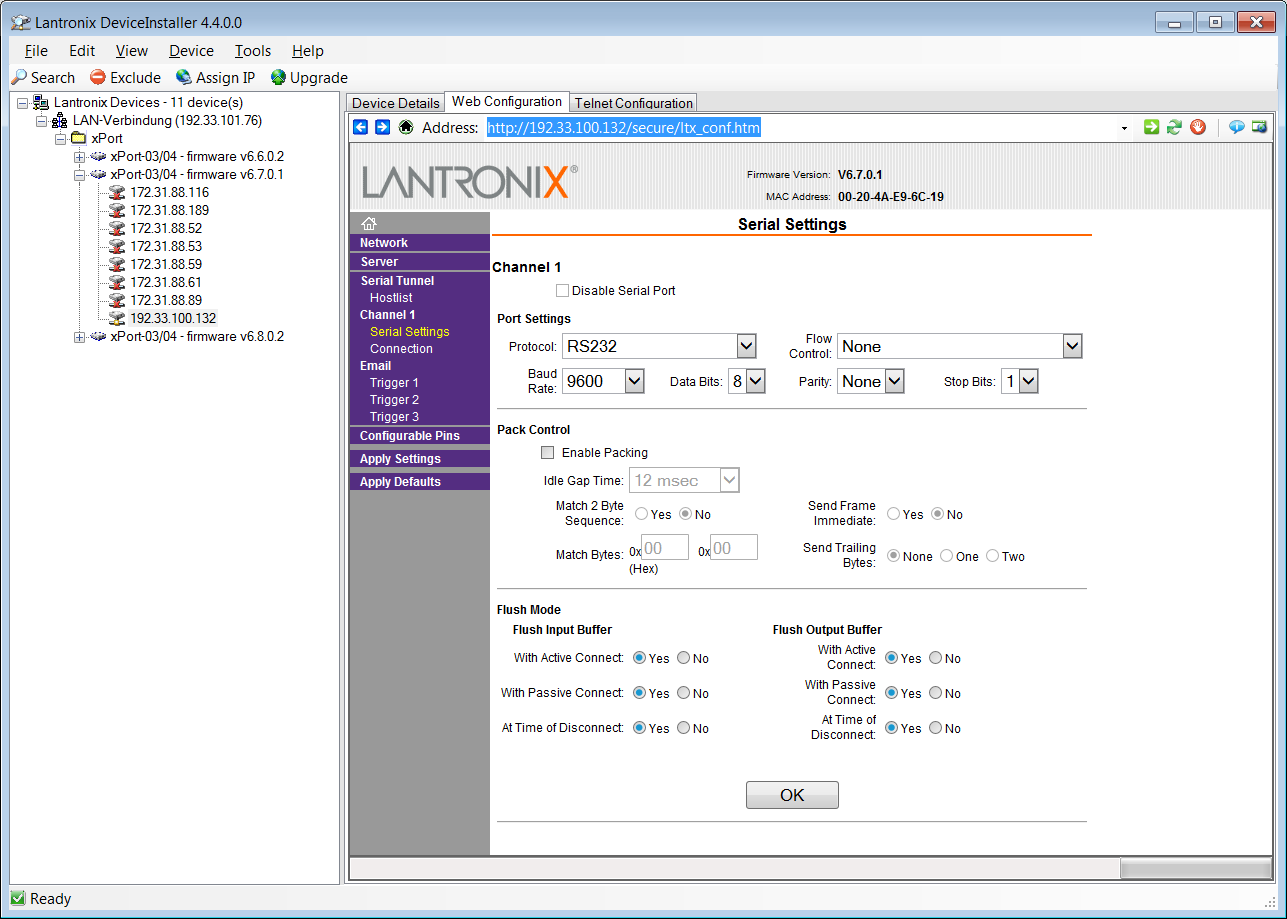
Step 6 : Serial Settings
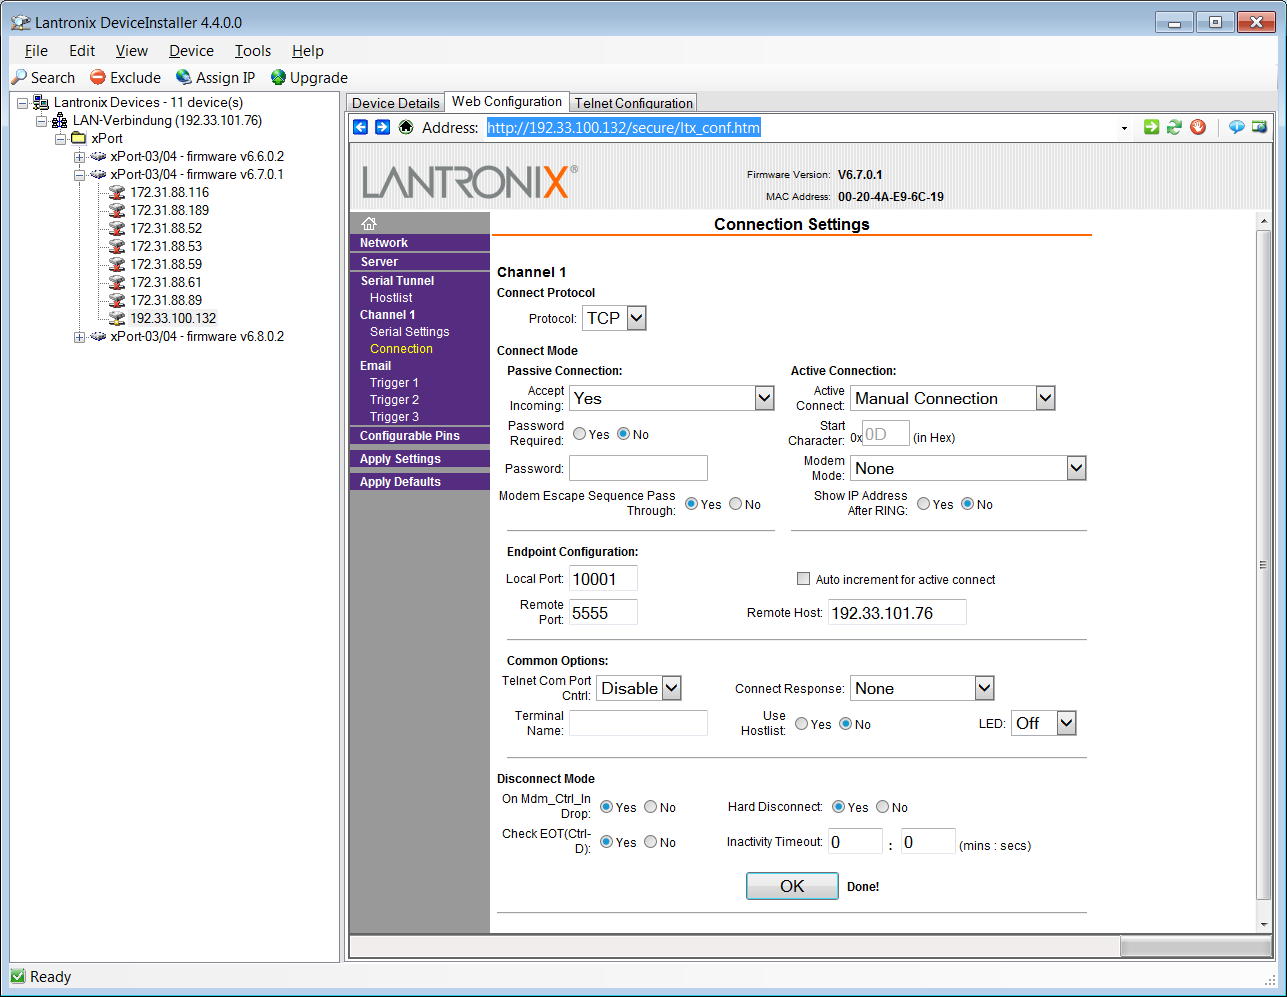
Step 7 : Connection Settings

Step 8 : Configurable Pin Settings
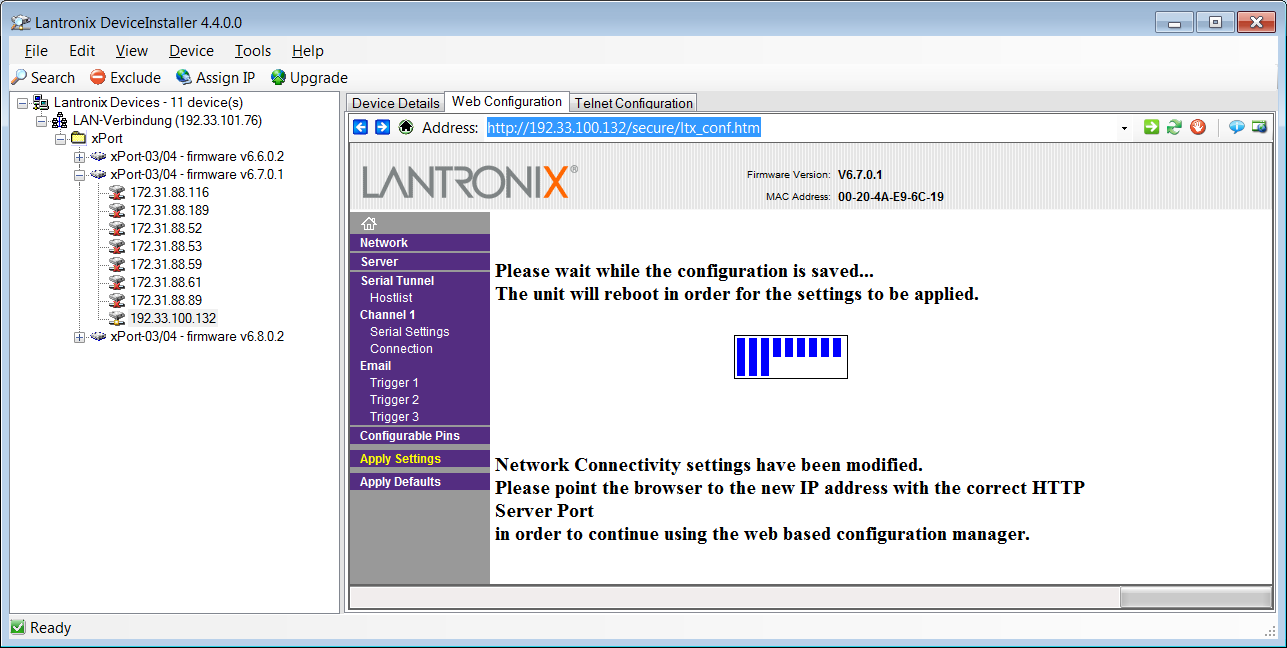
Step 9 : Apply Settings - The device will reboot
Note the IP, as it will be necessary to establish a connection in the next step.
Step 1 : Find your device with the MAC-address
Step 2 : Click on the corresponding IP to see the details
Step 3 : Proceed to 'Web Configuration'
Step 4 : Network Settings
Step 5 : Server Settings
Step 6 : Serial Settings
Step 7 : Connection Settings
Step 8 : Configurable Pin Settings
Step 9 : Apply Settings - The device will reboot
Note the IP, as it will be necessary to establish a connection in the next step.
Testing
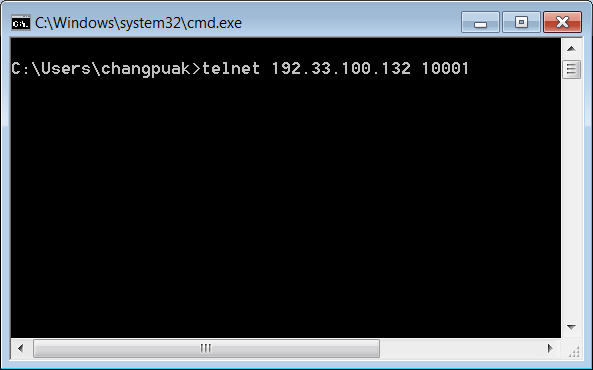
The device may easily be tested using the telnet command from the command shell. (cmd.exe). It may be necessary to install/activate the Telnet-Client. (Windows 7).
After done so, open a command shell and type telnet IP port. An oscilloscope connected to the RX port is useful. The current consumption was approx. 150 mA at 5 V.
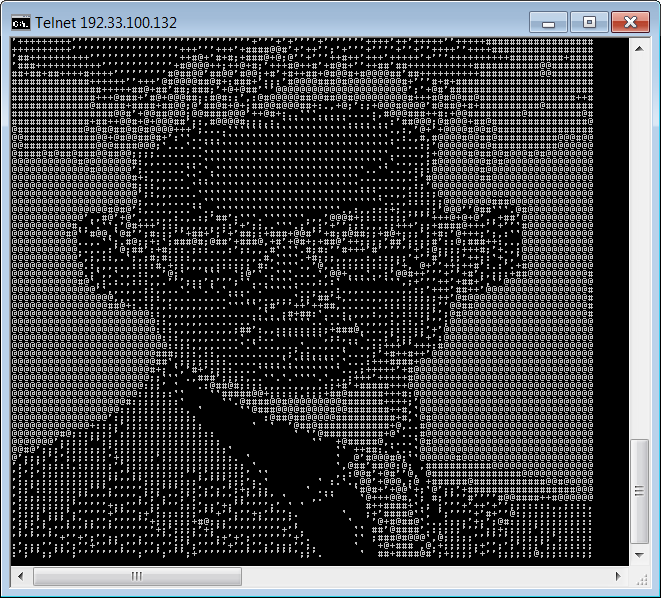
After pressing ENTER, a connection will be established. What you type now in this window, will be send to the xport and shows up at the RX pin (oscilloscope). You may create a loopback in connecting the RX to the TX. Every character will then be send back to your command shell. (You will see every charcter twice).
With HTerm it is also possible to send files. This may be useful if your parameters (like baudrate) are chosen to cause some errors. You may use this when investigating in BER (bit error rate).
The picture below is an ascii-fied image, send from my notebook via the UART-RS232 Adapter to the UART-XPORT Adapter and back to my notebook :-)
Downloads


")

✈ Share your thoughts
The webmaster does not read these comments regularely. Urgent questions should be send via email.
Ads or links to completely uncorrelated things will be removed.
Your Browser says that you allow tracking. Mayst we suggest that you check that DNT thing ?
|
t1 = 6498 d
t2 = 360 ms |
★ ★ ★ Copyright © 2006 - 2024 by changpuak.ch ★ ★ ★
|
|